
Pane di Pasqua (Italian Easter Bread)
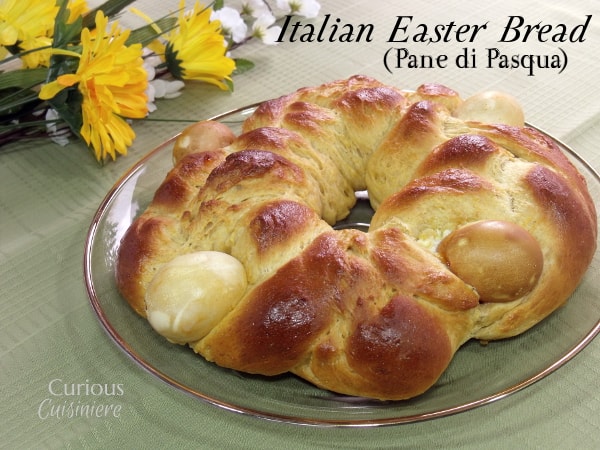
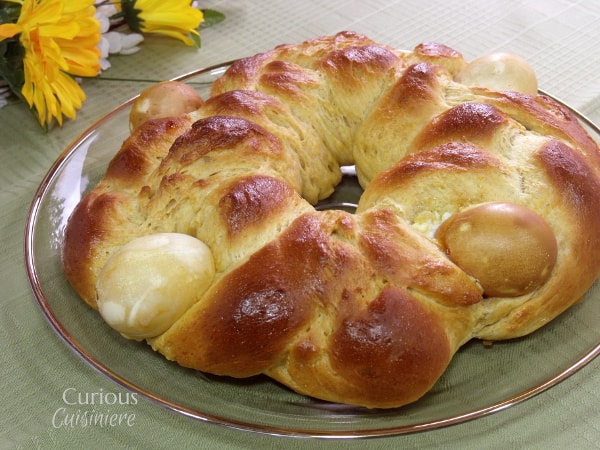
This fluffy and eggy Italian Easter Bread, Pane di Pasqua, is slightly sweet and bursting the with flavors of citrus and anise.
 Pane di Pasqua: A Symbolic Italian Easter Bread
It is no surprise that bread has incredible significance around many cultures' Easter tables.
Just as bread for centuries has been the prime source of bodily sustenance for daily life, Christ, whose resurrection Christians celebrate on Easter, is considered "the bread of life," (John 6:35), in whom believers will find their daily, spiritual sustenance.
This Italian Easter bread is braided with eggs, which also hold incredible Easter significance as signs from nature of new life, just as we are celebrating new life in the risen Christ.
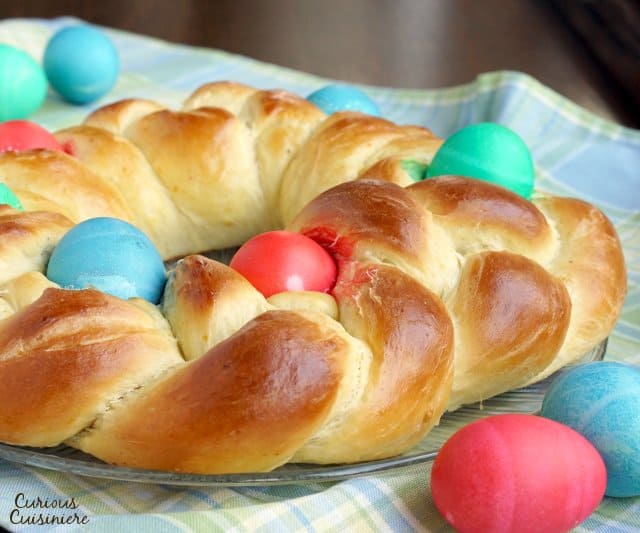
Due to the ending of the fast of Lent, where households would traditionally refrain from rich and sweet dishes, Easter breads are often rich, eggy breads that can range in sweetness, and sometimes are studded with dried fruit, which at one time was a luxury item. (Like this Romanian Easter Bread or Hot Cross Buns).
These are truly celebration breads that each household adapts to their own definition and means of celebrating.
Flavoring Pane di Pasqua
Pane di Pasqua is this oh so fluffy and ever so slightly sweet. This is the perfect background for the light and bright, springy flavors of citrus and anise.
Orange juice and anise are the main flavoring agents in this fluffy bread, and they mingle together quite well, with neither over powering the other as you enjoy each bite.
In order to really brighten the flavor of the bread, we use the zest and juice from the orange.
And, while ½ teaspoon of anise may seem like a lot, particularly if you're not an anise lover, the flavor really mellows as the bread cooks, leaving just a hint of spice in the finished loaf.
What can I substitute for anise?
We have gotten a lot of questions from people who want to make this Easter bread, but aren't a fan of the flavor of anise.
If you're looking for a substitute for anise in this bread, let us first say that the anise flavor in the finished bread is quite subtle. It is more of a light spice flavor than a quintessential anise/licorice flavor. So if you're on the fence, go ahead and give it a try.
That being said, if anise really isn't your thing (or you don't have it on hand), you can definitely leave it out of the bread and it will be just fine.
Other substitutions could be adding some cinnamon or nutmeg in the amount of ground anise we call for in the recipe (½ tsp). Still another option would be to replace the anise with 1 teaspoon of vanilla extract.
Whatever you decide to substitute the anise for, remember that it needs to pair nicely with orange, which is the other prominent flavor in the bread.
How To Make Braided Italian Easter Bread
While this loaf is quite impressive (as is fitting an Easter celebration table) and does contain a number of steps, it it definitely a bread that is worth your time to make.
- Make your dough: The dough for Pane di Pasqua should be soft and slightly tacky, but not sticky. It takes a little kneading by hand to reach a smooth consistency, but you can always use your stand mixer, if you desire.
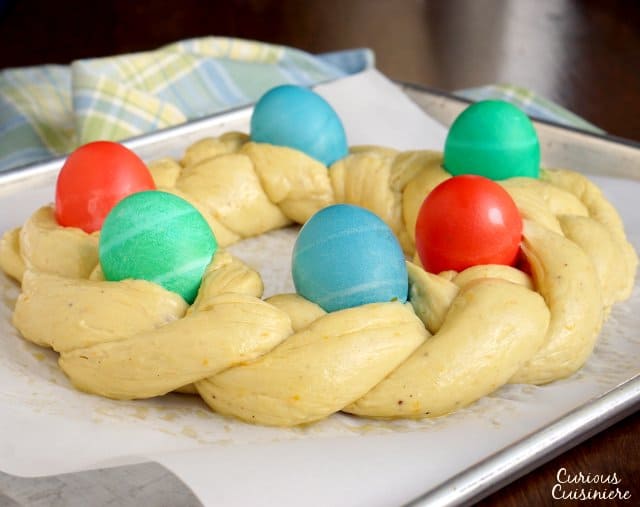
- Shape your dough: After the first rise, the dough is divided into three sections. Each section is rolled into a rope and the three are braided into a nice long braid that is pinched together into a circle on your baking sheet.
- Add the eggs: Colorful dyed eggs are then tucked into the braid. As the dough rises they settle into place.
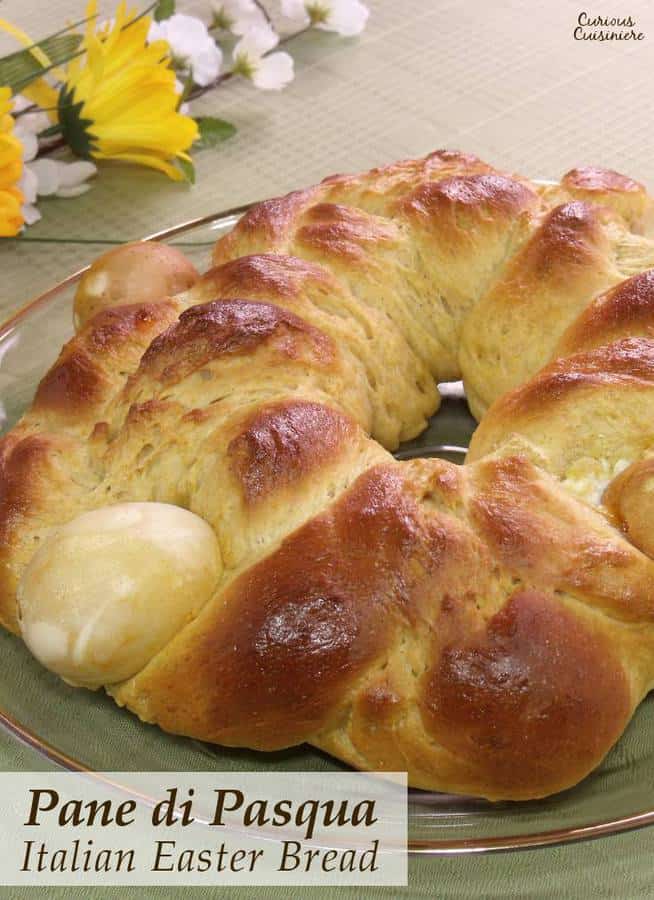
- Bake your bread: After the final rise, it's time to bake the bread! Like magic, the bread puffs up around the eggs and turns a beautiful golden brown.
- Let it cool: While it may be tempting to dive right into the fresh from the oven bread, the hot bread is fragile and it's best to let it cool for at least 5-10 minutes on the baking sheet before trying to move it.
Baking Eggs In The Oven
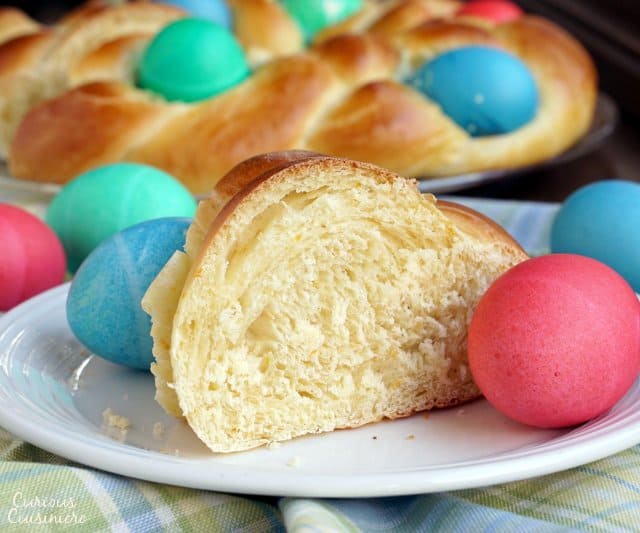
What makes this bread even more unique is that raw, dyed eggs are braided right into the dough before it is baked.
Don't worry about those raw eggs though, because the eggs cook as the bread bakes.
So not only do you have an Easter bread, you end up with dyed, hard-cooked eggs too!
Just be very careful as you're dying your raw eggs. You don't want to break them before they get cooked!
Maybe that's not the best task for the little kiddos.
We'll save the hard boiled eggs for them and let you have fun dying the raw ones!
Our Easy Italian Easter Bread Recipe
The dough for this Italian Easter bread is a very rich dough, containing milk, eggs, and butter.
This makes it very moist and slightly sticky as it comes together. But, after a bit of kneading, it becomes silky smooth and very easy to work with.

After one rise, this fragrant dough gets divided into three pieces and rolled into ropes that will be braided. If you find that the dough springs back on itself as you try to roll it into your 24 inch strand, stop rolling and let the strand rest for 5 minutes (covered with your damp tea towel). This will relax the gluten proteins and make it much easier to continue rolling your strand.
After you shape your bread into a circle and pinch your ends together, it's time to tuck the eggs into the braided dough.
This part can get a little tricky. Just gently separate the strands of the braid and tuck the egg in.
The most important thing here is to keep the eggs on top of the braid, or even a little towards the center of the circle. If you place them too close to the outer edge of the circle, they tend to roll further outwards as the bread rises.
No matter how the dough chooses to rise around your eggs, the result will be a very impressive loaf.
The beautifully colored eggs and the lovely golden loaf are the perfect recipe for an Easter table centerpiece.
Can I Substitute Fresh Yeast for Active Dry Yeast?
Recently we have been getting a lot of questions about substitutions for the active dry yeast in this bread. While we haven't tried using fresh yeast in place of the active dry yeast, it should work.
For this recipe you will need ⅔oz (19g) of fresh yeast in place of the 2 ¼ teaspoon of active dry yeast.
Fresh yeast will not need as long in the hydrating step #1 of the recipe instructions. It also may cause your bread to rise more quickly, so be sure to check it often during proofing.
Can I Substitute Instant Yeast For Active Dry Yeast?
Yes, you should be able to substitute instant yeast for the active dry yeast in this recipe as well. Use the same amount of instant yeast as we call for in active dry yeast.
If using instant yeast, you can skip the hydrating step (step #1) and simply add the yeast to the dry ingredients in step #2. (Don't forget to add the sugar and the milk to the wet ingredients in step #3.) Then, continue with the instructions as listed.
Note that the dough might rise faster on you, so keep an eye on it as it proofs.
Other Easter Breads
If you love the idea of Easter bread, you'll want to give Hot Cross Buns and Romanian Easter Bread a try too!
Pane di Pasqua (Italian Easter Bread)
This light and eggy Italian Easter Bread, Pane di Pasqua, bread is slightly sweet and bursting the with the flavors of citrus and anise.
Ingredients
For the Bread
- ½ c (118 ml) milk, warmed to 80-90F
- ¼ c (50 g) sugar
- 2 ¼ teaspoon (7 g) active dry yeast, (1 packet)
- 4 - 5 c (480-600 g) unbleached all-purpose flour, divided
- 1 teaspoon salt
- 1 orange, zested and juiced (roughly ½ c (118 ml) juice)
- 2 eggs, lightly beaten
- ¼ c (57 g) unsalted butter, melted and cooled
- ½ teaspoon ground anise, or pure anise extract
For the Braid
- 6 raw eggs, dyed if desired
- 1 egg, beaten with 1 teaspoon water
Instructions
Making The Dough
- In a small bowl, mix the warm milk with the sugar, until dissolved. Add the yeast and set the mixture aside until it begins to foam slightly, 5-10 min.
- While the yeast is hydrating, in a large bowl, mix together 3 c all-purpose flour and the salt. Set aside.
- In a medium bowl, whisk together the orange juice and zest, the beaten eggs, melted butter, and anise. Set aside.
- Add the yeast mixture and orange juice mixture to the flour, stirring until moistened. Add the remaining flour to the dough, a little at a time, mixing until the dough comes together.
- Turn the dough out onto a lightly floured surface and knead for 5-10 minutes, until soft and smooth.
- Place the dough in a clean, oiled bowl, turning to coat the dough with oil. Cover the dough with plastic wrap or a damp tea towel, and set in a warm (70-75F), draft-free place to rise until puffy and doubled, 1-2 hours.*
Shaping the Ring
- Once the dough has doubled turn it out onto a lightly floured surface.
- Divide the dough into 3 equal pieces and gently roll each into an 24” rope. (If the dough springs back on you, cover the ropes with a damp towel and let rest for 5-10 minutes to relax the gluten. Then try rolling them out again.)
- Pinch one end of all three ropes together and braid the strands loosely. Shape the braid into a ring on a parchment-lined baking sheet.
- Gently tuck the dyed, raw eggs into the braid. (Be sure to place them on top, or slightly closer to the center of the ring, as opposed to near the outer edge, as the eggs tend to roll to the outer edge of the ring during the final rising time.)
- Gently brush the ring with the beaten egg and water egg wash, being careful around the dyed eggs (the moisture from the egg wash tends to make the dye run).
- Let the ring rise until puffy and nearly doubled, 45 minutes - 1 hour.*
Baking The Bread
- Near the end of your rising time, preheat the oven to 350F.
- Bake the bread for 25 minutes, until the ring is golden and sounds hollow when tapped gently.
- Let the bread cool on the baking sheet for at least 10 minutes before transferring to a wire rack to cool completely.
Notes
*Since this is a rich dough, rise time may be longer depending on your kitchen and your dough. If it doesn't get puffy and nearly double in the time listed, just give it some patience and more time.
This recipe from 2014 was updated March 2018. We made the bread dough even easier to work with. Enjoy!
Nutrition Information:
Yield:
12Serving Size:
12 peopleAmount Per Serving: Calories: 155Saturated Fat: 1.1gCholesterol: 44mgSodium: 222mgCarbohydrates: 28gFiber: 1.9gSugar: 6.4gProtein: 5.3g
This is one of the recipes from the early days of Curious Cuisiniere. We've updated our pictures since we first shared it, but we've left some originals here, in case you've found us in the past and are looking for that old, familiar image.

Sarah founded Curious in 2010 as a way to save her recipe creations and share culinary experiences. Her love for cultural cuisines was instilled early by her French Canadian Grandmother. Her experience in the kitchen and in recipe development comes from over 10 years working in professional kitchens. She has traveled extensively and enjoys bringing the flavors of her travels back to create easy-to-make recipes.



Hi,
Does your recipe result in a moist not dry bread? I used another recipe I got off Pinterest and it was so darn dry I couldn’t even eat it. I ended up throwing it out.
Please send me your thoughts as to why this could of happened.
It's hard to say why your other recipe turned out dry. Ours is quite soft and tender. Being that it is a rich bread though it will dry out quickly, so it best eaten the day it is baked or the day after. After a couple days (particularly if cut) the bread will start to dry out.
Is there a high altitude recipe available for this? (4,000+ feet)
Hi Barb. I am not particularly familiar with adjusting recipes for high altitude. I would follow the adjustment guidelines given by King Arthur here: https://www.kingarthurbaking.com/learn/resources/high-altitude-baking.
This recipe is exactly what I was hoping for. I couldn't find my mom's, and now I don't need to keep looking. I did frost it with a powdered sugar glaze and sprinkles and used vanilla instead of anise, but it rose beautifully and the texture is perfect. Grazie mille!
So glad you enjoyed it!
I made this today and it turned out beautifully! My kitchen was pretty chilly today so the dough took definitley took some time but soon after I turned on my oven to bake cookies, I noticed the dough rising. It looks great but it's for tomorrow so I hope it tastes as great as it looks!
Thank you so much for the recipe!
Wonderful! Hope you enjoyed the flavor!
This was the first time I tried making this. It actually turned out nice. We haven't eaten it yet, that will be tomorrow. Hopefully it tastes as good as it looks.
We hope you enjoyed it!
This dough took 4 hours to rise! After 90 minutes I called the King Arthur bread hotline since I knew my yeast was good, and they said that the high sugar content in the dough would slow the rise and to just let it be. So... it did eventually double but in a much much longer time frame (dough in glass Saran covered bowl in 77 degree air temp checked by meat thermometer). Don’t give up!
This is a good tip Amy. Many factors can slow rise time. As long as your yeast is good, it will rise!
I live in Ireland, usually the weather is cold and when I use yeast still the dough does not rise as much as I would like, how can I do to fix this problem?
Hi Lily. When it is cool in our kitchen I place the dough in a bowl (covered with a damp tea towel) and put it in the (turned off) oven, leaving just the oven light on. The light keeps it just warm enough to proof the dough. My mom likes to boil some water in the microwave and then remove the boiling water and place the covered bowl with the dough in the warm microwave to proof. Hope one of these tricks helps!
Hello, I would love to make this braid for Easter. Is it possible to have the recipe in grams? I'm hopeless with cups!! Thanks - Sue
Hi Sue. I have updated the recipe to include grams. Enjoy!
I agree never raised! I make bread all the time and I set it to rise in the same place as always.. Just a waste of good product. Guess I should have dug harder for my own recipe, I didn't since the Granddaughter just stopped by. So very disappointed.
Hi Paula. We're sorry you had trouble with this recipe. Did you take the temperature of your milk before adding the yeast? If it was too hot, it could kill the yeast.
Hi there- I want to leave out the orange juice and peel. Should I replace it with more milk? I also want to add vanilla instead of anise. Is that okay?? Thanks!
Hi Stephen. Yes, replace the orange juice with milk, and you can replace the anise for 1/2 - 1 tsp vanilla. Enjoy!
If I wanted to make smaller loaves to give to friends, maybe a braid with 1 egg, how would I divide and braid the dough?
Hi Geri. That's a great idea! Depending on how large you want the loaves you give out to be, I would first separate the dough into 4 or 6 sections (for the number of loaves you're making). Then, divide each section into 3. Roll and braid those three. Shape into a ring and place an egg in the middle. Continue with the remaining sections. For baking the smaller loaves, I would start checking them after 15 minutes, but likely they will take closer to 20 minutes. Let us know how they turn out for you!
I'd like to leave out the orange juice as my Nonna never added citrus (she was allergic) so how can I make up for the dryness of the dough that is missing that 1/2 cup of liquid? Thanks!
Hi Christina. You could substitute either water or extra milk for the orange juice. Enjoy!
Hey! This is kind of off topic but I need some help from an established blog. Is it tough to set up your own blog? I'm not very techincal but I can figure things out pretty quick. I'm thinking about making my own but I'm not sure where to begin. Do you have any ideas or suggestions? Thank you
Hi Clifton. Please send us an email and we can respond better to your question.
Do you remove egg if not all eaten and store bread at room temperature and eggs in refrigerator?
Hi Jan. Yes. Remove the eggs and store the eggs in the refrigerator and bread at room temperature for up to 3 days. Any longer than that and you will want to put the bread in the refrigerator as well.
I found that the area where the eggs were sitting are still very doughy
Hi Halat. If the areas where the eggs was was still doughy, then you likely did not cook it for long enough or your oven temperature was too low.
I tried to make this recipe, and it was a disaster. I followed all instructions carefully and it was a mess. The dough was sticky and it never rose. Horrible.
Hi Deana. We’re sorry you had trouble with this recipe. If your dough was sticky, likely you didn’t add enough flour to it. And if it didn’t rise, your yeast could have be old or the rising place was too cool and you didn’t give it enough time. As you can see from other comments, most people have good luck with this recipe, so we hope you have a chance to try it again!