
Homemade Clotted Cream
Clotted Cream is deliciously creamy and the essential companion to a batch of British scones. You don't have to go to England to enjoy your tea-time treats though, because it is so easy to make at home!
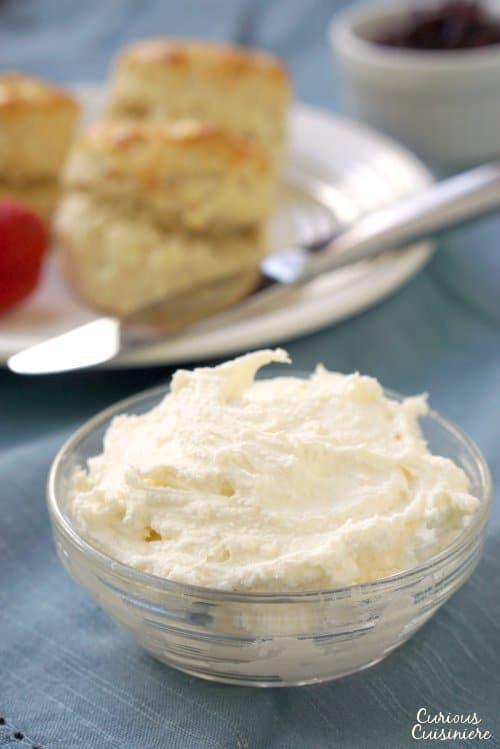
What is clotted cream?
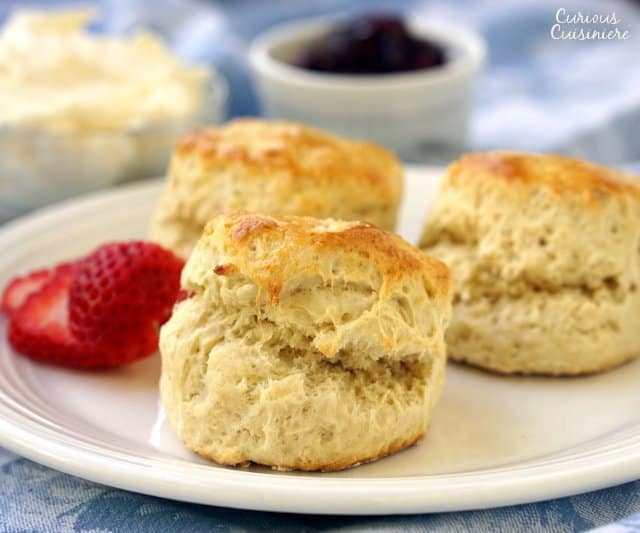
Clotted cream is a staple on British tea-time tables. You'll find it served in a little dish right alongside your scones (or very traditionally, Cornish 'splits', a type of yeast bun).
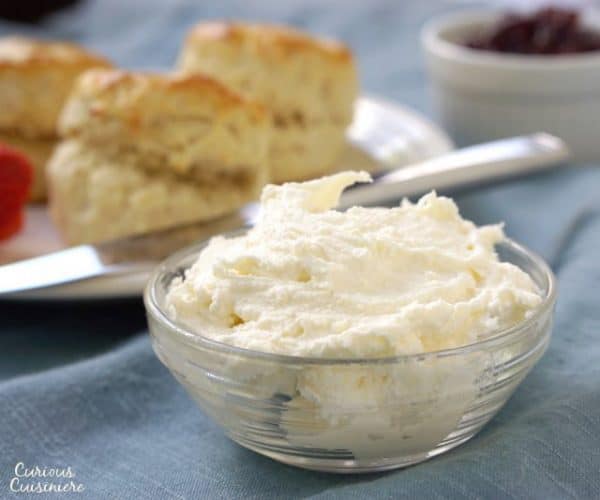
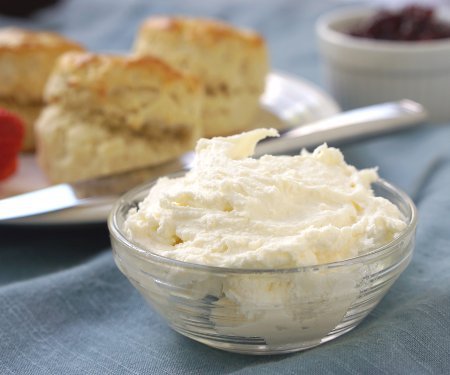
It is a thick, creamy, white spread, with the consistency of softened cream cheese. It is ever so slightly sweet, but mostly just incredibly creamy. Like a good, unsalted butter.
But so much more.
Devonshire cream vs clotted cream
Sometimes you may hear "clotted cream" called "Devonshire cream" or "Cornish cream". It really all depends on the region you are in.
The making of clotted cream started in Devon as a way to separate the fat from milk to make butter. Centuries later in Cornwall, it became popular to use the cream on its own. At that time, clotted cream and butter were the most popular ways to preserve milk.
One of our readers sent us a wonderful insight into clotted cream making, that is worth sharing. Angela spent her childhood during WWII at Callington with her grandparents who were retired farmers on the Devon/Cornwall border. She explained that the real difference between clotted cream in Devon and Cornwall came down to the process.
She stated,
"Devon cream was made by putting the full milk straight from the cow into a large enamel pan. It was then rested overnight to allow the fat to rise to the top. Then the pan was placed on the range over a pan of simmering water until the cream became a crust. (The milk must not boil!) It was then removed and allowed to become cold in the pantry - no fridges then.
When cold, the thick crust was carefully scooped off the top of the milk and put in a cream dish ready for use. The remaining fatless milk was used for cooking and on farms, surplus skim milk was used to feed pigs etc.
This was the method we used as we no longer had the farm. Just 2 bottles of unpasteurized full cream milk produced enough cream for splits, stewed fruit or junket.
Cornish clotted cream was made as follows - The full milk was poured through a separator. This was a rather complicated piece of mechanical equipment used on farms to separate the fat from the milk.
The full cream was then put into the enamel pan and very slowly heated on the stove until it thickened from top to bottom. No skimming needed. When cold, it could all be eaten!
This is what can be bought in supermarkets today."
Many thanks to Angela for sharing her knowledge and family heritage story with us!
Of course, those in Devon and Cornwall each claim that their cream is superior.
I guess we'll have to take a trip to decide for ourselves!
Ingredients
The ingredient list here couldn't be any shorter. You just need to get yourself some heavy cream.
However, the hardest part about making clotted cream might just be finding the cream.
You see, for best results, you need to start with heavy cream that has not been ultra-pasteurized for a longer shelf life.
Simply look for a carton of heavy cream that does not say "ultra-pasteurized", and you're good to go!
Can I use ultra pasteurized cream?
Finding non-ultra-pasteurized cream is becoming more and more difficult in the States, so many of our readers have asked if they can use ultra-pasteurized cream in this recipe.
Luckily, the answer is yes (most of the time). Some of our readers have had luck using ultra-pasteurized cream. However, because of what the ultra-pasteurization process does to the protein and fat molecules in the cream, you will get less clotted cream if you start with ultra-pasteurized cream than if you can find some that isn't.
How to make clotted cream
Clotted describes the look of the cream when it is heated ever-so-gently so that the fat separates to the top and clings together.
After you find your cream, the second hardest part of making clotted cream is the wait.
This is not a quick process.
The cream has to be heated slowly for 12 hours, which we find easiest to do overnight. Then it is cooled for another 8 hours (or over the next night).
Finally, you separate the cream from the liquid, and you have the spread that you have been waiting for.
It might take a long time, but it's mostly hands-off.
And it's SO worth the wait!
Can you make clotted cream in the slow cooker?
This is a question that we get often from our readers, so we did some testing to find out.
The answer is yes you can! Have a look at our recipe and process for making clotted cream in the slow cooker.
There are also some nice tips and tricks about making clotted cream in general over there, so even if you're thinking about making it using this oven method, take a look over there for the tips!
How to store the finished product
You will want to store your clotted cream in an airtight container in your refrigerator. For best storage, store it a place in your fridge that stays a consistent, cool temperature - so not in the door. Closer to the middle is where we like to keep it.
How long does homemade clotted cream last?
Your homemade clotted cream will stay fresh for about 3-4 days if properly stored in the refrigerator. After that, it may start to lose its consistency.
However, if you happen to let your clotted cream get just a bit past its prime and the texture just isn't quite right you can always use it to make fudge or ice cream.
How to use clotted cream
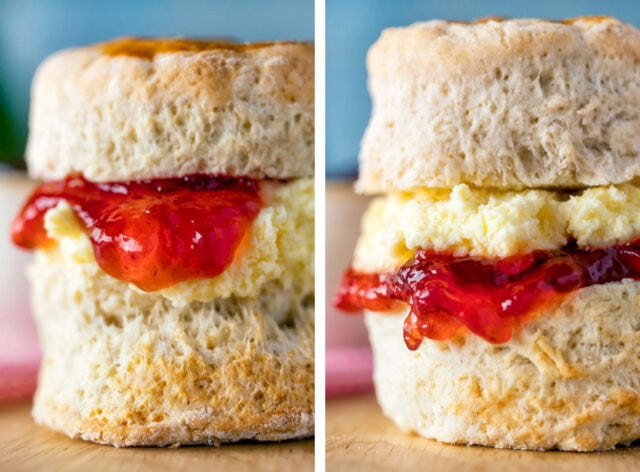
The traditional use for clotted cream is on scones, with jam, served with tea.
However, if you find yourself with an excess of clotted cream and no scones, you can always serve it with Irish soda bread, muffins, apple pie, a fruit tart, or any dessert or sweet bread of your choosing. It also makes a nice fruit topping.
Basically, you can use it any way you would typically use whipped cream or butter.
Savory uses for clotted cream
Clotted cream typically lends itself to sweeter uses: spread on scones (or "splits" as Angela pointed out to us were more common where she was growing up) with some jam.
However, it is rich and creamy and you can use it for savory applications as well.
We think it would be delicious as a veggie dip or spread on a cucumber slice as an appetizer.
You could also add it to mashed potatoes, risotto, or eggs to give them extra creaminess, much like you would butter. Or you could add it to soups or sauces to give them a creamy boost.
What's the difference between clotted cream and whipped cream?
While at first, a bowl of clotted cream might look similar to whipped cream. But once you take a taste, you'll know the difference.
Both start with the same basic ingredient: heavy cream. But, for whipped cream, you whip that cream into light and fluffy pillows. Often you'll add sweetener and possibly a flavoring, like vanilla, to whipped cream as well.
Clotted cream, on the other hand, is heated and separated, as we'll go into more detail below. This process produces a thicker, creamy substance.
Another difference is that clotted cream is typically not sweetened. People love it for the creamy texture it adds, similar to butter, rather than a particular sweetness or flavor.
What's the difference between clotted cream and butter?
So, if it has a thicker consistency and is more savory, how is clotted cream different from butter?
Again, it comes down to the process.
Butter is made by churning (or whipping) cream. So, if you over-whip your whipped cream, you'll end up with nice, whipped butter.
Clotted cream, again, has to do with the separation of the fat in your cream.
Our reader Angela pointed out to us that the making of butter in a churn took additional time and hard work. So making clotted cream was a much easier option.
What to do with the leftover whey from making clotted cream?
When you make clotted cream, you will be left with a thin, milky liquid below the clotted cream.
That liquid is basically skim milk, and while we don't think it has the best flavor for drinking, it is perfectly good for baking.
You can use it in any baking recipe that calls for milk. Our favorite way to use it is to make a batch of British scones.
However, it would also work well to make this Brazilian French toast or this Finnish braided bread.
Can you freeze clotted cream?
Frozen dairy tends to lose its thickness and creamy texture, so we wouldn't recommend freezing homemade clotted cream. (We'd use it in some of the ways suggested above first.)
That being said, we have heard of some people having luck freezing clotted cream in an airtight container, if it is thawed overnight in the refrigerator before you would like to use it.
If you'd like to try this, we'd suggest starting with a small test batch to see how you like the results.
Buying jars of imported clotted cream can get quite pricey. But you don't have to worry about that anymore!
Homemade Clotted Cream
To make clotted cream, you will want to start the process 3 days before you plan to serve your cream. It sounds like a lot of time, but most of the process is done while you sleep!
Ingredients
- 2 c (237 ml) heavy cream, (not ultra-pasteurized)
Instructions
Day 1
- Preheat your oven to 170-180F.
- Pour the cream into a shallow casserole dish or glass baking dish. (The cream should only come up the sides about 1-2 inches. The key here is to have a lot of surface area.)
- Place the cream in the oven for 12 hours, uncovered. (This works great overnight.**)
Day 2
- After heating for 12 hours, the cream will develop a skin. Carefully remove the dish from the oven and let it cool to room temperature. Once cool, cover the dish and refrigerate it for 8 hours (or overnight again).
Day 3
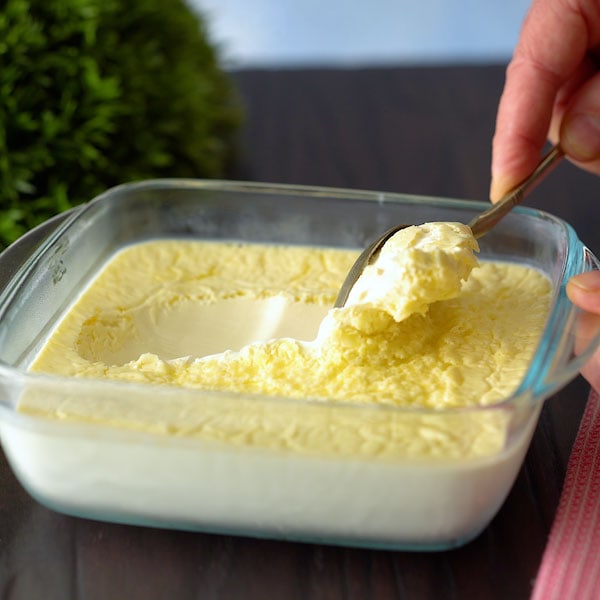
- After chilled, gently skim the thick layer of clotted cream from the surface, leaving the thinner liquid behind. (It will feel like you’re pulling a layer of slightly softened ice cream from the top of a layer of milk*. The skin in fine, it will soften as it is mixed into the cream.)
- Gently stir the skimmed clotted cream to create a smooth texture. (If your cream is too thick for your liking, you can always stir a little bit of the thin liquid back into your cream, until it reaches your desired consistency.)
- Store the clotted cream in a sealed container in the refrigerator for up to two weeks. (Clotted cream can also be frozen and thawed in the refrigerator, if desired.)
Notes
*The leftover liquid can be used like milk. It’s great for baking!
** Oven note #1: Some ovens have a safety feature that shuts them off after extended periods of time. If this is your oven, you may want to do the clotting step during the day, when you can make sure your oven stays on and at a low temperature.
Oven note #2: We have a lot of readers who are discovering as they try this recipe that their oven runs hot. After 12 hours in the oven, their cream has developed a dark brown skin. The skin on your cream should only be a pale tan if it starts to darken. If you think your oven may run hot, check your cream after 8 hours and again after 10 hours to see if the top is darkening. If it is, you may need to cycle your oven between off and on to keep a temperature that is not too hot for the cream. (As a side note, the darkened top on the cream does not mean it is ruined. It simply means your finished cream will have a bit of a deeper flavor, and it will most likely have some flecks of brown and not be a pure creamy white.)
Nutrition Information:
Yield:
16Serving Size:
1 gAmount Per Serving: Calories: 101

Sarah founded Curious in 2010 as a way to save her recipe creations and share culinary experiences. Her love for cultural cuisines was instilled early by her French Canadian Grandmother. Her experience in the kitchen and in recipe development comes from over 10 years working in professional kitchens. She has traveled extensively and enjoys bringing the flavors of her travels back to create easy-to-make recipes.


Thank you so much for posting this!
I am trying Nadiya Hussain's Strawberry Shortcake Cupcake recipie out. I have all the other ingredients but did not want to spend all my energy trying to find clotted cream in NYC, or wait a couple of days for it to be shipped when I could try making it at home.
With that said, I have no idea if my result is traditional, but the skin was golden and the smell reminds me of ghee. I've got something lovely here!
I am going to send pictures to my food science teacher as well, because this would be a great experiment for class, like when we made seitan to learn about gluten. There's a lesson about glucose/lactose in here.
Lovely! Yes, there is definitely a lesson in glucose/lactose here! Enjoy!
Well I tried this recipe and to my surprise my oven automatically shut off at 12 hours! First, I questioned not putting the pan in a water bath, as other recipes indicated. I saw A LOT of oil rise to the top, so I spooned this off. After I let it cool at room temperature, I skimmed off what I thought was more fat, then put in the refrigerator overnight. This morning I had a layer of cream and milk, without the crust. I just reread the recipe and realized I misread it and should not have scooped anything off! 🤣🤣
Sorry you had trouble Jan. Yes, what you scooped off would have become your clotted cream. Better luck next time!
would this work in a yogurt maker , ??
Hi Pam. You can check out our article on making clotted cream in a slow cooker for a bit more information. (https://www.curiouscuisiniere.com/slow-cooker-clotted-cream/) We're not too familiar working with yogurt makers, but the clotted cream does need space for evaporation to happen. So, for example, readers have found that an instant pot and sous vide don't work the best. Ultimately, the only way to know would be to test it out. If you give it a try in the yogurt maker, let us know how it works for you!
I found pasteurized heavy cream and I gave it a try. Follow the instructions to a t but I was not happy at all with the result. The upper layer was thick and the rest very runny.. very disappointed 😞. It’s not worth the time, money and gas used for 12 ours.
Hi Emily. It sounds like yours turned out perfectly. (I hope you didn't throw it away!) That thick upper layer is your clotted cream. As per the instructions, you skim it off and stir it together. The runny lower part is a byproduct of the clotting process, it can be used for baking like you would milk.
WOW this turned out GREAT! I couldn't believe it! We made a double batch so I took my hand at skimming the cream off the liquid then let my 8 year old granddaughter try the second and she insisted on stirring both batches up -- beautiful creamy and rich! Thank you! I'll never buy clotted cream again!
So glad you enjoyed it!
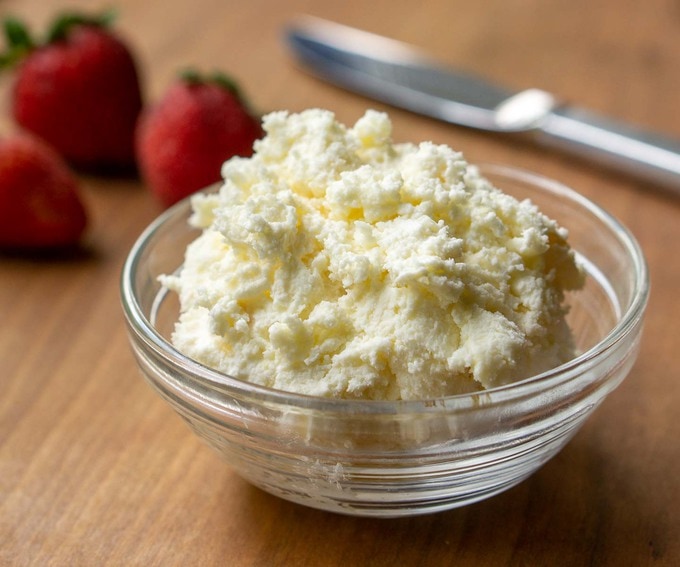
Hi! I tried your recipe and have a question. I took the clotted cream out of the pan and began to stir it. I didn't add any additional liquid. At first it was quite thick and very hard to stir and now it seems to be too thin and has chunky hard bits in it. Is this ok? Will it thicken again to be more spreadable? It's more like a custard consistency now and could be poured. I don't mind eating the chunky bits, just wondering if it will stay runny and I need to do something different.
Did you take out only the firm part and leave the liquid before stirring? As that firm, clotted cream warms up to room temperature, it will soften to a more spreadable consistency. There may be some more firm, crust chunks in it. From our British readers, this is desirable in homemade clotted cream. Some even leave the chunks larger. But, those used to store bought clotted cream, tend to prefer a more uniformly creamy consistency. Those harder bits should soften in the stirred cream over a day or two in the refrigerator. It is a bit odd that you say it is runny, unless you stirred all the separated liquid back into it. I would refrigerate it and see if it firms up for you.
ok, thank you! I didn't add any of the liquid back in, I only took the thick cream from the top. I reserved the remaining liquid for future baking as you suggested in the recipe. I plan to leave the chunks and just put it back in the fridge after the initial stirring. It hardened up nicely. More spreadable and not so runny now!
Good to hear!
Can clotted cream be used in savory dishes?
Hi Lynda. Great question! We get asked this often, so we added a section above about it. You can really use it any way you would butter or creme fraiche. We like to add some herbs and salt and make a creamy veggie dip or canape appetizers. It is also great stirred into savory dishes that you want to give extra creaminess to, like sauces or mashed potatoes. Enjoy!
This sounds great. Could a Sous Vide be used to make it?
Mike Watson
Hi Mike. We haven't tried this ourselves in a sous vide, but one of our readers did try it and found that the sous vide didn't work the best to make clotted cream because it doesn't really allow for evaporation that helps to make the nicely clotted section and the crust. She followed our instructions for clotted cream in the slow cooker, and it worked ok, but didn't give the best yield. So she didn't find it worth while.
I used ultra pasteurized heavy whipping cream because that is all that is available here in Denver (unless you belong to a milk delivery service). It turned out great! I used 1 pint Organic Valley and put it in an 8×8 glass dish. Organic Valley is grass fed and supposed to be 40% fat content). I had set my oven to 180 but the oven thermometer said it was 190-195 (Organic Valley also makes a pasteurized, but again, it's not available here). I’m not sure I trust the oven thermometer in my case because everything else I bake completes at the regular baking time. It took only 8 hours for my clotted cream to bake, and I ended up with only 1/3 cup whey/leftover cream. This shorter time could be due to the lower amount of cream perhaps, or if my oven did run warmer, perhaps it cooked it faster.
Thanks for sharing your process!
Hope to try making cream the way you have said. But when you remove the crust of the cream it is Never ever stirred. I have always made it in the past with the traditional method with milk but look forward to seeing how your recipe works out. We always made butter from any left over cream
Hi Beryl. Thanks for your comments. People who prefer the more traditional version do seem to like the crusty bits in the cream. Those who have never had it made traditionally and only store-bought, prefer the super creamy texture and are a bit put off by the chunks of crust. It's all about preference, so do as you enjoy!
If I don't intend to use all of the clotted cream immediately, I keep the liquid part and later stir with the remaining clotted cream, which tends to get a butter like consistency after a few days. After letting the mixture rest for an few more hours in the fridge it has a perfect consistency again and it remains this way for days.
Great tip! Thank you!
We used cream that was ultra pasteurized and it turned out great.
Great! Thanks for sharing Mary! Do you mind sharing what brand?
I forgot to cover the dish in the fridge, is it unsafe now? 🙁
Hi Amanda. The top might be a bit dried out, but we would still eat it in our house. 🙂
Excellent! It's pretty thick and chonky but still delicious! Going to try it again this weekend and be less distracted. Thanks for the recipe!
Hi Amanda. Glad you're enjoying it! If it is too thick, you can mix some of the thin liquid from the clotting process back into the thickened clotted cream. And we find leaving it out for a while before serving will also soften it nicely.
Hello! My husband is British, and he has been ordering clotted cream (expensive!) from England. I can’t wait to try this recipe and save $! You mentioned using a slow cooker as a possible alternative, how do you advise cooking it the slow cooker?
Hi Lisa. We have a whole article on our method for clotted cream in the slow cooker. Enjoy!
Hello - can I make this in my Instant Pot mini (3 qt) or my Ninja Foodi (6 qt)? I don't trust my oven.
Hi Addie. If you can use your Instant Pot like a slow cooker you could likely follow (or adapt) our method for clotted cream in the slow cooker. Enjoy!
I just realized--if I set it to "keep warm", that may allow the extra time (don't rremember what the keep warm temp is though. It just may work.
I thought of that (using the IP ultra setting because you can adjust the temp). The problem I have with that idea though is the max time MY IP Ultra will allow is 4 hours and no more. I set it at 6 hr (for example) but when it gets to temp, it starts the countdown at 4 hours every time. It's a puzzler.
Thank you for sharing this recipe!
My oven's lowest temp is 200. I am trying to cycle between on and off as you suggested. Is it necessary to keep cooking it the full 12 hours? Mine already has a golden top after 5 1/2. Is there some other marker of doneness that it might achieve before 12 hours have passed?
Hi El. I thought I had responded to this earlier, but apparently not, so I apologize. If using a glass container, you should see some separation through the side. If it is looking golden after 5 1/2, I would just leave it in the warm (but turned off) oven for a few more hours, until you hit at least the 10 hour mark. It needs the time to complete some of the evaporation and separation. Hope it turned out well for you!