
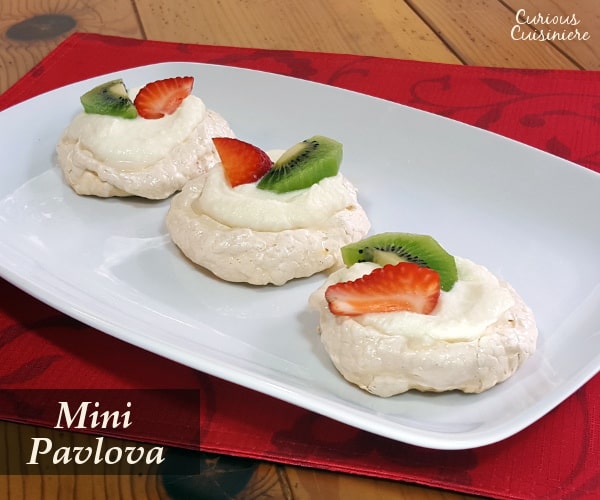
Light and airy meringue pavlovas look so elegant that you’d think they took a lot of work to put together. But, really it only takes 15 minutes of work to create this beautiful summery dessert.
 Light And Airy Pavlova
 Light And Airy Pavlova
This classic dessert from Australia and New Zealand was created for the Russian ballerina Anna Pavlova during one of her tours to New Zealand in the 1920’s. The dessert, Pavlova (pronounced pav-LOH-vah), is essentially a meringue cake with a crisp crust and a soft, marshmallow-y inside, typically topped with whipped cream and fresh fruit.
Pavlova: More Than Just Meringue
While meringues bake up light, airy, and crisp throughout, pavlovas are different in that the center stays soft and chewy. This is caused by the addition of the sugar after the egg whites have reached soft peaks, which gives the meringue an extra airy texture and adding just a splash of vinegar, which helps to keep the inside soft while the crust crisps. In addition, it is baked at a low temperature, just warm enough to dry the crust. Then it is left to cool in the oven to keep it at a consistent temperature and stop it from falling.
Since it is a crisp shell around a soft interior, pavlovas are a bit fragile. Don’t worry if yours cracks though. That is part of the presentation! Once topped with whipped cream and fruit, it still looks wonderful.
Tricks to Making Meringue
That’s the old wives saying about the key to making a good meringue, and it really does hold true. While pavlovas (and meringues) are incredibly simple to make, there are a few tricks that will guarantee your fluffy meringue success.
- A dry day – Make your meringue on a day with low humidity, or crank your air conditioner to dry out the air. Too much moisture in the air will result in meringue that just won’t dry out. If you find that your pavlova crust just doesn’t want to get dry and firm up (like a shell), it’s not you, it’s the humidity.
- A low oven – We’re not really baking the meringue here, we’re drying it out. So you do want to keep you oven low. The meringues should be starting to feel like they have a solid crust just as they are starting to turn lightly golden. If you notice them turning a dark, caramel color or getting dappled spots, your oven is probably set too high. (Or it is too humid and you are having to bake them for too long, see the previous point.)
- Old eggs – The older an egg is the thicker the egg white will be, and thick egg whites help to hold the air as they are whipped, giving you a loftier meringue.
- A clean bowl – Any fat in your bowl (grease or fat from the egg yolk) will prevent the egg whites from whipping to their full, airy potential. So, make sure your bowl is clean (glass and metal bowls are easier to clean) and keep those yolks out of the whites.
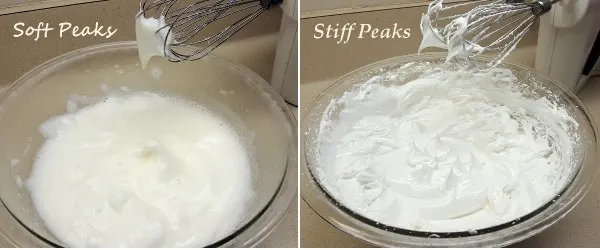
- Don’t over beat – We find it hard to over beat egg whites, but it can be done. You are looking for the whites to hold a stiff peak, meaning that when you lift your beaters out of the pillow-y mass of whites the peaks stand straight up, not flopping or folding over. It is said you should be able to hold a bowl of perfectly whipped meringue upside-down over your head without any falling out. We haven’t put ours to the test yet. But feel free, if you like. (We will not be held responsible for any egg white hats though.)
 Serving Our Mini Pavlova
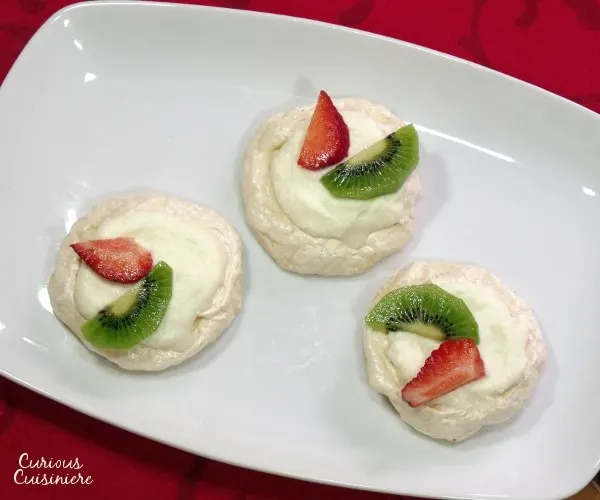
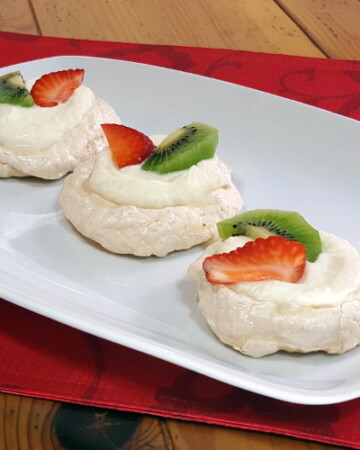
In Australia and New Zealand it is traditional to decorate pavlovas with whipped cream, kiwifruit, and strawberries. Around the world you will also find them topped with lemon curd and an array of other fruits.
The shells can be made ahead of time and stored in an airtight container once they are completely cool. Once topped, the shells do start to lose their crispness, so they should be served immediately. This is why we like the individual shells so much. You can make just as many as you need for your guest (or make a pavlova bar and let your guests top their own), and the leftover shells (if you have any) can be saved.
What a perfect summer treat!


Mini Pavlova
Ingredients
- 4 egg whites, room temperature (old egg whites work best)
- Pinch salt
- ¾ c sugar
- 1 ½ tsp cornstarch
- ½ tsp pure vanilla extract
- 1 tsp white vinegar
For the Topping
- 1 1/2 c whipped cream*
- 4 kiwi, peeled and sliced
- 6 strawberries, quartered
Instructions
- Preheat your oven to 250F with the rack in the lower third of the oven. Place your egg whites and salt in a very clean glass or metal bowl. In a small bowl, mix together your cornstarch and sugar. In another small bowl, mix together your vinegar and vanilla. Line a baking sheet with parchment paper. Now we're ready to get whipping.
Making the Meringue
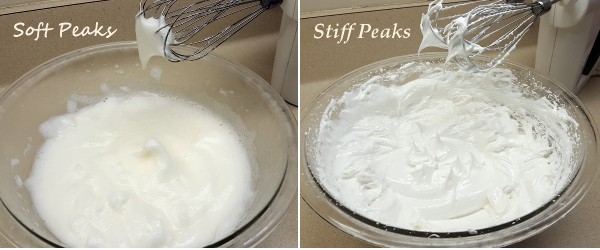
- Using the wire whisks of your stand mixer or electric hand mixer, begin beating your egg white and salt mixture on a low speed, steadily increasing up to medium high. The whites will get frothy and then turn to soft peaks. (The egg whites have reached soft peaks when you can turn off your mixer and lift the beaters out of the fluffy egg whites and you get peaks that fold back down on themselves.)
- Once the egg whites have reached soft peaks, start adding your sugar and cornstarch mixture, slowly (about 1-2 Tbsp at a time), while beating on medium high speed. Once all the sugar has been added, continue beating until the egg whites hold stiff peaks, this could take up to 5 minutes. (You've reached stiff peaks when you can turn off your mixer and lift the beaters out of the egg whites and you get peaks that stand at attention and don't fold over.)
- Add the vinegar and vanilla mixture to the egg whites and beat for another 20-30 seconds, just until they are fully incorporated.
Baking the Meringue
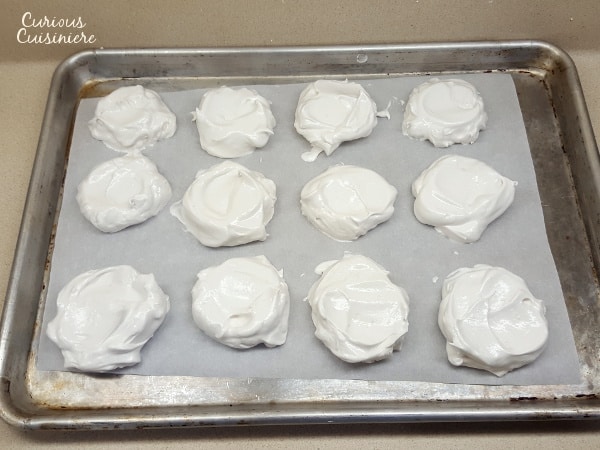
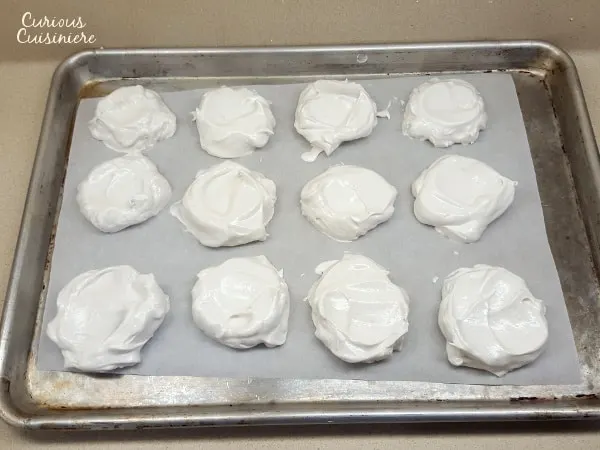
- Scoop the meringue onto the parchment lined baking sheet, using roughly 1/3 c for each mini pavlova. Gently shape the meringues into nests, with a slight indentation in the middle, leaving roughly 1 inch space between them. (The meringues will grow slightly in the oven.)
- Put the meringue in the oven and bake for 45-55 min. The pavlova are done when the outside shell is starting to firm up and get dry to the touch (not tacky) and they are just starting to get lightly golden. (The shell will continue to dry out, but only a little, as they cool.)
- Turn off the oven, leaving the pavlova inside. (This will allow the pavlova to cool slowly, keeping them from falling due to drastic temperature shifts.) Leave the pavlova in the oven 1-2 hours, or until cooled. (They can be left in the oven overnight as long as your house isn’t humid.)
- To store the pavlova shells, place them in an airtight container on the counter. They will keep this way for several days.
- Just before serving, top the pavlovas with whipped cream and fresh fruit.
Notes
If you liked this recipe, here are some similar dishes you may enjoy!


Sarah is one of Curious Cuisiniere’s founding duo. Her love for cultural cuisines was instilled early by her French Canadian Grandmother. Her experience in the kitchen and in recipe development comes from years working in professional kitchens. She has traveled extensively and enjoys bringing the flavors of her travels back to create easy-to-make recipes.
Jessica
Thursday 30th of April 2020
Can you use cornflour instead of cornstarch?
Sarah Ozimek
Monday 4th of May 2020
Hi Jessica. The cornflower I am faminilar with would be the wrong consistency for these pavlova. Cornstarch is white and very light, starchy, and powdery (even more so than powdered sugar). If your cornflower is that consistency, then it should be fine to use. (However, if it is grainy and heavy, it will not work.) Arrowroot starch would may be a good substitution if you need it, however we haven’t tried it specifically.
palatablepastime
Monday 7th of September 2015
I am going to remember these for a desserts party! I like that they are small so I can set up a table with a variety of things for guests.
Sarah Ozimek
Tuesday 8th of September 2015
They would be perfect for a dessert party! I'd love to do a party spread with them and set out a number of different toppings.
Sarah Reid, CNP (@jo_jo_ba)
Sunday 6th of September 2015
Thank YOU so much for posting this!! I was desperate for a mini pavlova recipe to use in Home Ec for my "food around the world" series and this looks perfect!
Sarah Ozimek
Monday 7th of September 2015
Glad we could help Sarah :) You'll have to let us know how your class goes!
MealDiva
Sunday 6th of September 2015
The BEST dessert of all time:)
Sarah Ozimek
Monday 7th of September 2015
Agreed!
Wendy, A Day in the Life on the Farm
Sunday 6th of September 2015
This is the second Pavlova recipe I have seen in the last couple of days. I think it is a sign that I should make some.
Sarah Ozimek
Monday 7th of September 2015
I think it is Wendy! You won't be disappointed!