
Authentic British Scones
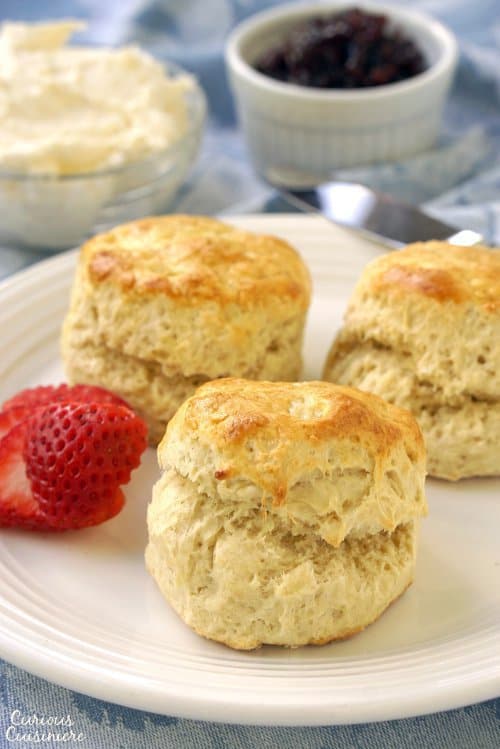
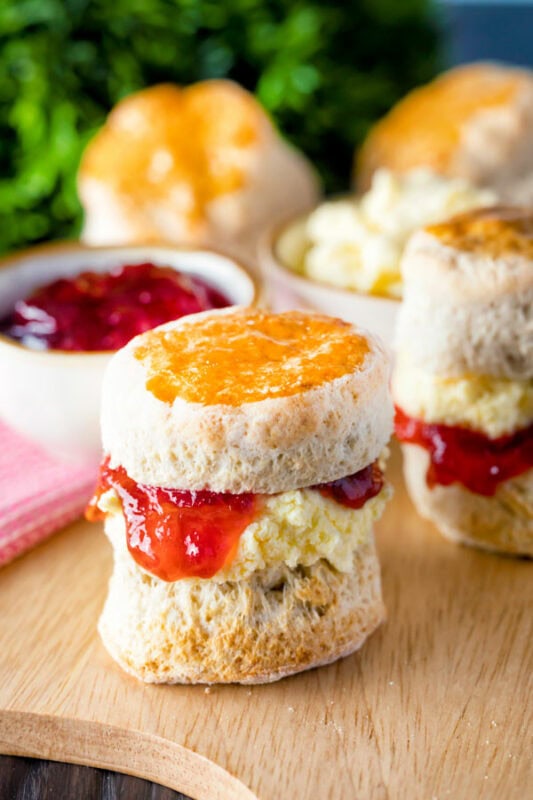
An authentic British Scone is a perfect accompaniment to your warming cup of tea, particularly if you have some clotted cream and jam to serve it with!
What is a scone?
When you hear the word "scone" do you think of a fancy British tea-time spread? Or do you think of the sugar-dusted pastries in the Starbucks display case that you might be tempted to grab to go along with your morning coffee?
Authentic British scones aren't eaten for breakfast. Rather, they are served with tea as a light snack for "cream tea" in the mid-morning or with afternoon tea. (Not to be confused with "high tea," which includes more savory nibbles.)
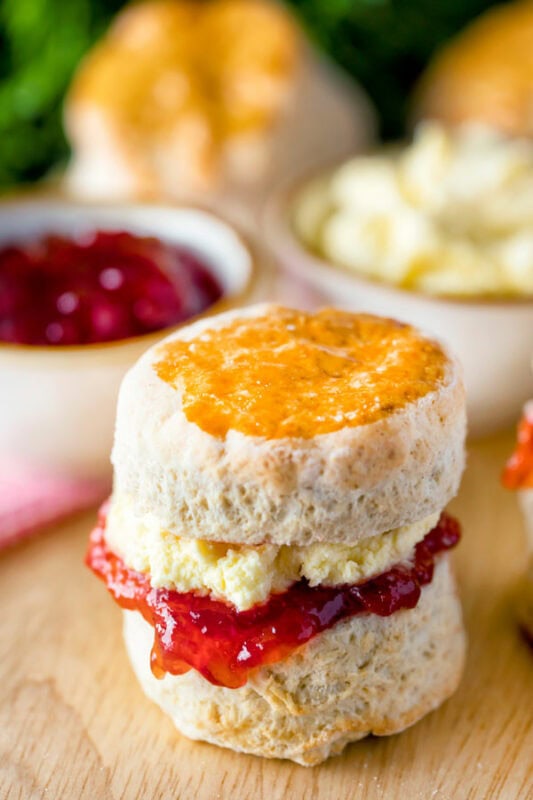
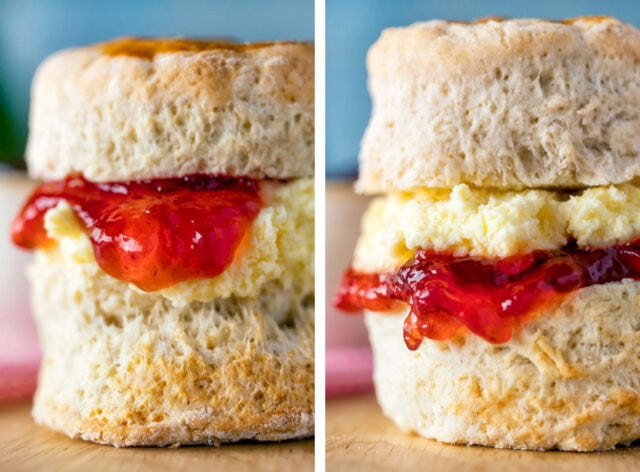
British scones are small nibbles that are fairly plain on their own but are classically eaten with jam and clotted cream, making for a real treat.
Is a scone a biscuit?
When you first try an authentic British scone, you might be tempted to think of it as a biscuit. (Unless, of course, you're from the southern US, where biscuit-making is an art. No real scone would fool a Southerner as a biscuit, that's for sure.)
But, you can't deny that the two are similar.
The basic ingredients for biscuits and scones really are the same: flour, leavening, a little salt, some fat, milk, and maybe a little sugar. The process too is similar: cut the fat into the dry ingredients, add the liquid, roll, and bake.
The difference comes down to a subtly in texture and how they are served.
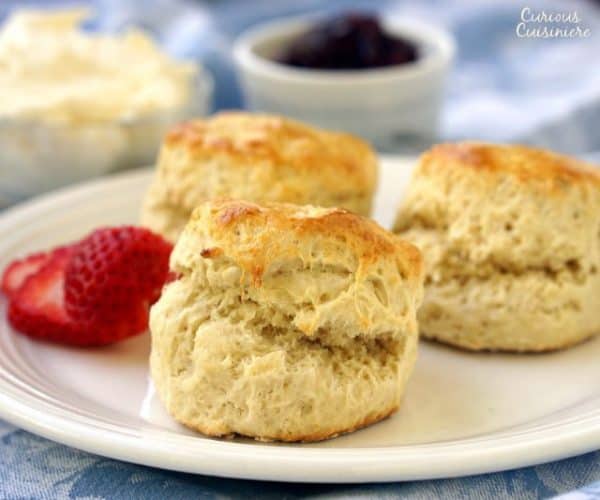
British scones are denser, slightly drier, and more crumbly than biscuits. They typically contain much less butter than biscuits as well.
While biscuits most likely originated from the British scone, they have been transformed and now are the scone's buttery cousin. Because of the extra butter, biscuits should be light and fluffy with tender layers.
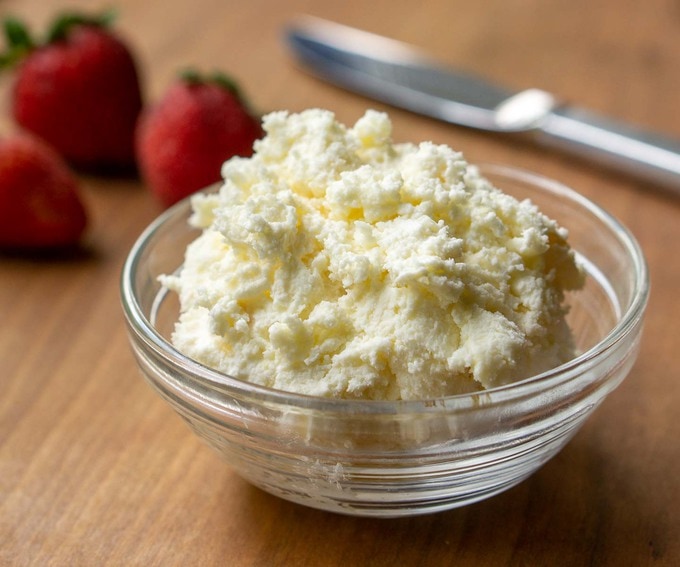
While scones are spread with jam and clotted cream (which you can make yourself as oven clotted cream or as slow cooker clotted cream), biscuits more commonly find themselves in savory applications, like with sausage gravy or an egg and bacon.
What is the difference between an American scone and a British scone?
If you walk into a coffee shop in the States, you're bound to come face to face with some tasty treat labeled "scone". It will probably be sweet, most likely filled with any number of sweet add-ins, and possibly even covered with a sugary glaze.
It might be biscuit-like in texture or it might be cakier, depending on the establishment. And, it probably will be about the size of your hand.
By now you know better.
These are not traditional British scones! They're too big, too sweet, and too stand-alone. Not to mention all the flavor add-ins that are unheard of when it comes to a traditional scone. (Which might get some raisins tossed into the batter, but that's about as crazy as things get.)
Besides, when was the last time you ventured to put jam on your American scone? (As if it needed the extra sugar.)
Ingredients and substitutions
Scone dough is made from simple ingredients that you probably keep your pantry stocked with. So, you can have a batch of scones turned out dangerously fast.
- Flour - Basic all-purpose flour is what we want here.
- Sugar - Just a little.
- Baking powder - You will use way more than you think you should for this amount of flour. That helps get the high rise.
- Salt
- Butter - Use slightly cold butter for best results.
- Milk - We prefer whole milk, but any will do.
- Egg wash
How to make English scones
All the differences aside, if you can make biscuits, then you can make scones.
To make them you first mix the dry ingredients. Then rub in the butter until it is evenly distributed and the consistency of the mixture is sandy. Then add the milk until you get a slightly sticky dough.
Once the dough comes together, you knead it just a couple times on the counter. Then you press it flat and cut out your scones.
Place them on your lined baking sheet, brush with egg wash, then they are ready for the oven!
The one difference we take between making biscuits and making scones is that for scones, we use our hands to massage the butter into the dry ingredients. Doing this creates a fine, sandy consistency that helps give the scones their classic texture. (For biscuits we cut the butter into the dry ingredients, which leaves larger chunks of butter in-tact, creating those tasty, buttery layers.)
How to store and reheat
British scones will keep well in an air-tight container on the counter for 2-3 days. If you plan to keep them longer than that, we recommend freezing them.
To reheat your scones, we recommend putting them in a low oven (300F) or toaster oven for 5-10 minutes.
Can I freeze scones?
Yes! These work wonderfully frozen, either before or after baking.
To freeze the scone dough and bake it later, cut out your scones from the dough and then place the rounds of dough on a baking sheet. Place the whole sheet in the freezer and freeze until solid. Once the rounds are solid, you can remove them from the baking sheet and put them in an airtight container or sealable bag in the freezer until you are ready to bake them.
To bake from frozen, simply put the frozen rounds on a baking sheet and bake per the recipe instructions. You may find that you need to bake them for an extra 5 minutes or so, but keep an eye on them.
To freeze them after baking, let them cool completely before freezing in an airtight container. If you have a lot to freeze, we would recommend freezing them in a single layer first (like you did for the dough rounds) before transferring them to the long-term storage container.
From baked and frozen, simply let the scones thaw to room temperature before reheating.
These scones will stay good in the freezer for 3 months.
Why did my scones not rise?
If you didn't get the lofty scones that you were hoping for there are a few things to check.
- Is your baking powder fresh? It should be less than 6 months old for best performance.
- Did you overwork the dough? Make sure you're stirring and kneading it as little as possible to get it to come together.
- Did you twist the cutter? This is a big one. You need to press the cutter straight down and pull it straight up. If you twist the cutter, even a little, you will seal the edges and the rise will be less than optimal.
Why do my scones taste off?
Occasionally we have readers comment that their scones taste metallic or bitter. Here are some things to check:
- Double check that you used baking powder and not baking soda. It is an easy mistake to make!
- Did you use a US teaspoon measure or weigh your baking powder? Teaspoon measures in different countries are different sizes and in this case even a slight difference can make a big taste difference.)
- Did you mix your dry ingredients? It could also be that the baking powder didn't get mixed in well enough.
- Are you sensitive to baking powder's flavor? Some people are. If this is the case, you can dial back the baking powder in the recipe. You just may not get as high of a rise.
With the high amount of baking powder in the traditional scone recipe, seemingly little things can make a bit impact on the flavor!
Whether you call it a biscuit or a scone, these tasty treats are great for breakfast or for an afternoon nibble.
Just don't forget the jam and clotted cream!
Authentic British Scones

An authentic British Scone is the perfect accompaniment to your warming cup of tea, particularly if you have some clotted cream and jam to serve it with!
Ingredients
- 2 c (250 g) unbleached all-purpose flour
- 2 tablespoon (27 g) sugar
- 4 teaspoon (8 g) baking powder*
- ½ teaspoon (2 g) salt
- 3 tablespoon (42 g) unsalted butter, cold
- ⅔ c (158 ml) milk
- 1 egg yolk beaten with 1 tablespoon milk, (to glaze)
- Strawberry jam, (to serve)
- Clotted cream, at room temerature (to serve)
Instructions
- Preheat your oven to 425F.
- In a medium bowl, mix the flour, sugar, baking powder, and salt until well combined.
- Add butter. Rub the mixture together with your fingers to break up the butter, until the mixture resembles fine breadcrumbs.
- Add the milk slowly, mixing as you add, using enough of the milk to get your dough to come together with no lumps remaining. (Your dough should be quite sticky. If a good consistency is not achieved with the listed amount of milk, continue adding until your dough reaches a good consistency.)
- Spoon the dough out until a well-floured surface. Generously dust the top of the dough and knead the dough 2-3 times to coat it with flour and smooth the surface. Press the dough into a round that is roughly 1 inch thick.
- Using a well-floured cookie cutter, cut the dough into 2 inch circles. (Be sure to press the cookie cutter straight down and up. Twisting the cookie cutter will impact the amount of rise you get on your scones.)
- Place the rounds onto a greased and floured baking sheet. Brush them gently with the egg yolk and milk mixture.
- Bake the scones for 12-15 minutes, until golden and firm.
- Remove the baked scones from the oven and let them cool for 30 minutes (if you can resist). If you like softer scones, cover them with a clean tea towel as they cool.
Notes
FREEZING:
This scone batter freezes well. We like to freeze pre-cut rounds of dough for easy baking (just thaw and bake as directed).
Alternately, freeze the baked scones and reheat in a low oven for 5-10 minutes after thawing on the counter.
*A note on baking powder:
The baking powder has been a point of hot debate for this recipe. First, make sure you are using baking POWDER, not baking SODA. You will get a metalic taste with that much baking soda. Second, we are using US teaspoons here, not UK teaspoons. (Yes, they have a different volume.) Finally, we know the packages of baking powder say that 1 teaspoon is equal to 4-4.8g (depending on your brand), however we (and multiple testers) have weighed our baking powder and always come up with somewhere between 2-3g per teaspoon. When we weighed the amount of baking powder we used in the recipe it came to 8g. So, if you are having trouble with the recipe tasting metallic or are sensitive to the flavor of baking powder, we'd suggest going with 8g of baking powder. We can't explain the difference in weight, but we are certain about what we used.
Interested in info on WEIGHT measurements? Have a look at our ingredient conversion guide.
Nutrition Information:
Yield:
10Serving Size:
1 sconeAmount Per Serving: Calories: 71

Sarah founded Curious in 2010 as a way to save her recipe creations and share culinary experiences. Her love for cultural cuisines was instilled early by her French Canadian Grandmother. Her experience in the kitchen and in recipe development comes from over 10 years working in professional kitchens. She has traveled extensively and enjoys bringing the flavors of her travels back to create easy-to-make recipes.
This recipe doesn't call for eggs in the dough?
No, there are no eggs in the dough.
I have been on the search for a great scones recipe and this did not disappoint. Thank you for sharing such a wonderful and consistent recipe. You made my Christmas afternoon tea memorable
We're so glad you found us and you enjoyed the scones! Merry Christmas!
Very manageable and came out beautiful
So glad you enjoyed them!
Can you store the dough in the refrigerator before cutting them into rounds? We have no room in our freezer at the moment, and limited room in our fridge.
Depends on how long you would be storing them. They should be fine for 24-48 hours. (Although I haven't tried it.)
@Gary, should be fine. I always put my cut out scones in the fridge for at least 15 minutes before I bake. The butter doesn’t quite melt as fast in the oven and I get a better scone.
Love it! Made for a friend too! Thank you.
So glad you enjoyed them!
Can you cut the scones into shapes for Christmas with shaped cookie cutters?
Yes! That would be so fun! Just be sure to go straight up and down with the cutter, not twisting at all, so they get a nice rise. Enjoy!
do you glaze them if you are freezing them? Or wait until you are ready to bake them?
Hi Symphonie. Wait until you are ready to bake. Enjoy!
Made em. Love em. Adding you in IG. Thx Sarah,
The Self Worth Guy
So glad you enjoyed them! Saw your pictures, they looked perfect!
This might be a silly question, but how do you freeze the pre-cut rounds of dough? Do you lay them flat in a freezer bag? Do you use wax/freezer paper?
Hi Bailey. Not silly at all. To freeze them un-baked, I typically place them in a single layer on a parchment paper-lined baking sheet (a sturdy cutting board works well too if a baking sheet is too large for your freezer). I will freeze them this way for 24 hours and then transfer them to an air-tight container or bag. Enjoy!
While watching a British real estate show, I was introduced to 'clotted cream'. Dreams of using it on scones filled my head! (When my sons were still at home, and it was cold out, I would serve them apple cinamon tea and scones with a variety of toppings. Now my sons are in their 40s.)
Anyway, the urge to start baking again is here, so I read your scone recipe and had a question for you: why use unsalted butter and then add 1/2 tsp of salt? I should know the answer, but don't!
Hy Cynthia. Great question! We use unsalted butter because then you can control exactly how much salt goes into the scones. The salting of butter is not exact, so your salted butter could be more or less salty than my salted butter. Using unsalted butter ensures more consistent results. Enjoy!
Mine came out a bit flat and I'm wondering why? They taste really good but they don't have much height. I'm thinking it's either because I used a measuring cup instead of a cookie cutter or I rolled out the dough too thin. What do you think?
Hi Kristin. Both could have caused them to not have the height. It is important not to twist the cutter, and I find that when I use a measuring cup to cut biscuits, I tend to have to twist it to get a good cut. You also want your dough rolled to one inch thick.
Used this recipe to make scones for a Scottish friend of mine. She said these scones we ‘spot on’. The only difference for her was that her nan used to put sultanas in their scones. I made her scones, clotted cream and raspberry jam. She loved them! Thanks for this recipe.
So glad she enjoyed them! Thanks for sharing!
Oh my gosh! Phenomenal! A few years back I went to the UK and just fell in love with scones and clotted cream. Since then, I have tried recipe after recipe and while somewhere close, it was just something wrong about the texture. This was dead on! I did do a couple things differently. Due to arthritis in my hands, sanding the dry ingredients with the butter just isn’t possible but I did find out with my piecrust that you Could put it all in the food processor and whiz it around until it’s really fine. Then after I add my milk, I dump it out onto a parchment paper and then just use the parchment paper to lift the sides and press down into the dough. I discovered with piecrust that this way you get all the liquid in. without adding too much and ruining the crust. Thank you so much!
So glad you enjoyed them! Great tips! Thank Melody!
Can I make the scones the night before & place them on a baking sheet & refrigerate them all cut & ready to pop on the oven the next day????
Hi Christine. We have not tried to make them this way, but they should work. I would let them warm up slightly on the counter before baking. Let us know how they turn out for you!
When you say "knead 2-3 times" after first spooning the batter onto a floured surface and sprinking flour on top of what you've just spooned...what do you mean? How long do you knead it for? I'm not quite following what this step should look like, specific to "kneading" 2-3 times.
Hi Cassie. That step is referring to 2-3 kneading motions (folding and pressing) to simply get the dough coated in flour and smooth on the exterior. Hope this helps!