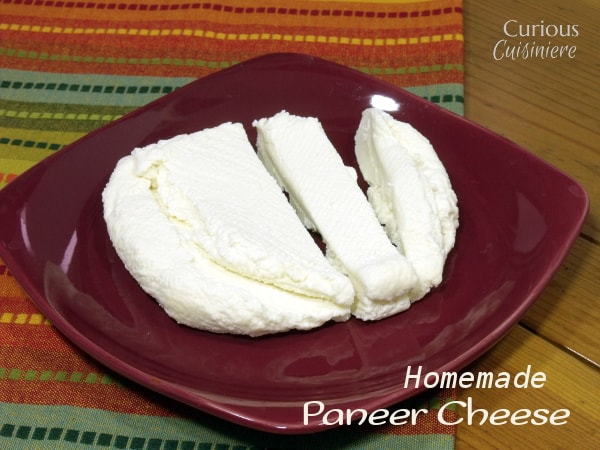
Homemade Paneer Cheese
Soft cheese is easier to make at home than you would think, and homemade paneer is a great place to start!
How To Make Homemade Cheese
Cheese in an interesting thing when it comes to unprocessed foods. It is easy to make at home, but it does take a little time. So, most of us have come to rely on store-bought cheese. Which, isn't a bad thing, as long as that cheese is staying true to what cheese should be.
We all know it, but sometimes we've got to hear it: processed cheese and cheese "products" don't quite fit the bill.
Cheese is made from milk, salt and enzymes or acid. Once you start getting more complex than that, you're running straight into chemicals, preservatives, and other additives that are being used to make something that may look and taste like cheese, but isn't as good for us or as close to what cheese was meant to be.
But, the good news is, you can make some of the softer cheeses at home without any special ingredients or tools.
And, it's pretty cool to be able to say that you made your own cheese. (At least, we think so!)
What is Paneer?
Paneer is an un-aged, fresh cheese common in Indian and South Asian cuisine.
It is a soft cheese, similar to cream cheese, ricotta or mozzarella. And, it can be used crumbled or it can be pressed and cubed.
Is Paneer Different From Ricotta?
The difference between ricotta and paneer is an interesting one.
Traditionally ricotta cheese is made from the whey that is leftover from the process of making a soft cheese like mozzarella. However, since most people don't have lots of whey hanging around from ample mozzarella-making endeavors, it has become common to simply make ricotta with milk.
When ricotta is made with milk (rather than whey), technically what you are making IS a creamy (un-pressed) paneer.
How To Make Paneer
Heat milk. Add acid.
Yup. That's about it.
You'll bring your milk to just below the boiling point. That's about 200F. It will start to steam and quiver, but don't let it get bubbly. Heating the milk starts to chemically change some of the proteins, which helps with the texture of your final product.
Once the milk is warm, then comes the acid. Acid causes the milk proteins to change from a liquid into a solid state, forming what we know as curds.
After letting the curds form, you strain the whey off of the curds, and you have cheese! You can eat it like this, or you can gather the curds in a cheesecloth and press out more of the whey, forming a more solid block of cheese. As a block, the cheese will hold its shape and can be cut to desired sizes.
Choosing Milk for Homemade Paneer
One thing that is incredibly important is your milk. Whole milk has the most proteins that will form the curds, giving you better cheese, but we have heard that 2% can be used as well. We'd stay away from anything less than that.
The other thing to look for are the three letters UHT. These tell you that the milk has been Ultra High Temperature Pasteurized (sometimes simply labeled Ultra Pasteurized).
UHT pasteurization heats milk to 275F and is used to give milk a 6-9 month shelf life before it is opened. But, heating milk that high starts to break down the proteins needed to form those curds we want. So, look for milk that simply says pasteurized or HTST (high temperature short time) pasteurized, as these only heat the milk to 161F, and don't interfere with the proteins needed for our cheese curds.
Using the Whey From Homemade Paneer
Sure, that watery substance that you wrung out of your cheese might not look like much, but it isn't trash!
It has a slightly creamy/cheesy flavor and is super high in protein! You can use it to replace water or milk in baked goods, pasta sauces or soups. Try a splash in your morning smoothie. Or, use it to boil pasta, potatoes, rice or beans.
If you have picky eaters in the house who might notice the slight change in flavor, start by substituting half of the water or milk for whey. They probably won't even notice the difference.
Using Homemade Paneer
Paneer makes a great snack, but it is also a common addition to vegetarian Indian curries like our Paneer and Potato Curry.
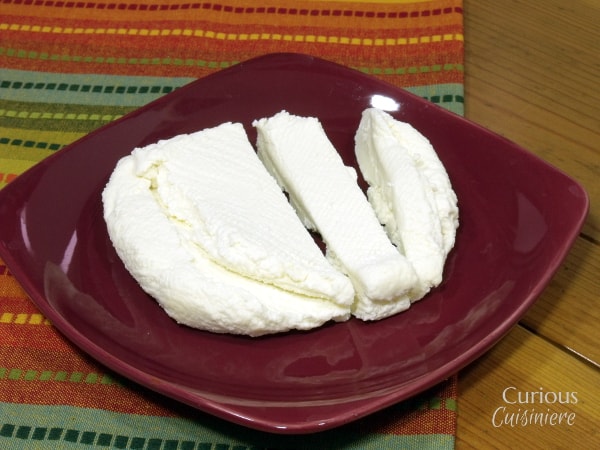
Homemade Paneer Cheese
Ingredients
- ½ gallon whole milk (not UHT pasturized)
- 1 large lemon, juiced (roughly ¼ c juice)
- ¼ teaspoon salt
Instructions
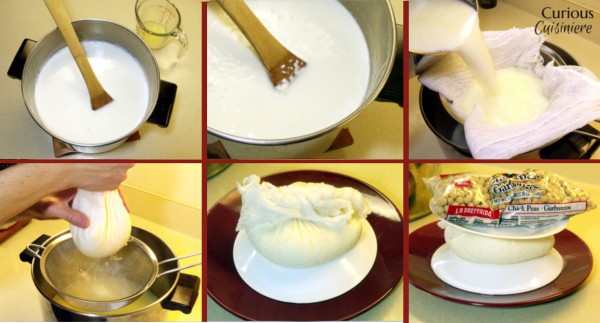
- Place the milk in a large saucepan and heat over medium heat until just before it beings to simmer (200-210F), stirring occasionally to keep the milk from sticking to the bottom of the pan.
- Remove the milk from the heat and stir in the lemon juice. The milk will begin to curdle. Cover the milk and let it set for 10-15 minutes. During this time the curds and whey will begin to separate. (If the milk hasn’t separated, add another tablespoon or two of lemon juice and let stand for an additional 10-20 minutes. If it still doesn’t separate, you probably have UHT milk on your hands.)
- Pour the milk into a strainer lined with cheesecloth, letting the whey collect in a bowl beneath the strainer.
- Once you have collected all the curds into the cheesecloth, mix in the salt (if using). Then, gather the cloth together and squeeze as much liquid as you can from the curds. (You cheese can be used at this time if you want ‘grated’ paneer, but to make a solid brick of cheese, continue on.)
- Place a small bread plate, inverted on a larger dinner plate. Place the cheese in the cloth on top of the smaller plate. Plate another plate on top of the cheese bag and top with a 1-2 lb weight (a bag of beans or rice works well). Refrigerate while pressing for at least 1 hour.
- Once pressed, you can remove the cheese from the cheesecloth. Use it immediately, or refrigerate it for 2-3 days.

Sarah founded Curious in 2010 as a way to save her recipe creations and share culinary experiences. Her love for cultural cuisines was instilled early by her French Canadian Grandmother. Her experience in the kitchen and in recipe development comes from over 10 years working in professional kitchens. She has traveled extensively and enjoys bringing the flavors of her travels back to create easy-to-make recipes.

Hi Sarah,
I came across your blog when I was searching for British scone recipes, cause once I had it in England, I just couldn't go back to the scones I used to eat in the States... When I saw your scone photos, my heart almost popped out of my chest!
Then I explored your blog and felt like you're living my dream 🙂 I love traveling and cooking, and am super curious. I love exploring the world in my kitchen and learning about different cultures and authentic cuisines. I'm so glad to have found your blog! I just wanted to thank you for creating this space for people like me to feel alive and adventurous!
Oh I forgot I actually had a question! How is this cheese different from ricotta cheese? I tried making it once and I just thought the method and ingredients look the same as your paneer recipe. Is the difference in the level of moisture in cheese?
Hi Jamie! We’re so glad you found us! The difference between ricotta and paneer is an interesting one. Traditionally ricotta is made from the whey that is leftover from the process of making a cheese like mozzarella. However, since most people don’t have lots of whey hanging around, it has become common to make ricotta with milk. Technically, ricotta made this way IS paneer. I think we’ll have to update our article to include this info, because it is a great question!
We travel full time, and lately (in Malaysia) it's often hard to find fresh milk. Does powdered milk work? UHT is easiest to find here, but sounds like that's not an option. I'm already dreaming about the palak paneer I want to make with this!
Thanks for your comment. We haven't tried using powdered milk, but according to our research, it should work. Use the whole milk variety and reconstitute it according to the package directions before using it to make the cheese. Give it a try, and be sure to come back and let us know how it turns out for you!
I do a quick and dirty version of this to create 'buttermilk' for baking (a thing I do all of the time). Just squeeze juice of a lemon into some milk let stand a moment or two and voila, the most yummy buttermilk for making muffins, pancakes - any old thing
That is such a great idea, and one we use a lot too. We never have actual buttermilk on hand. Just don't use enough of of it.