How to Roast a Turkey
Don't be afraid of that holiday bird! We're giving you step-by-step instructions for how to roast a turkey. And tips for beautifully seasoned meat.
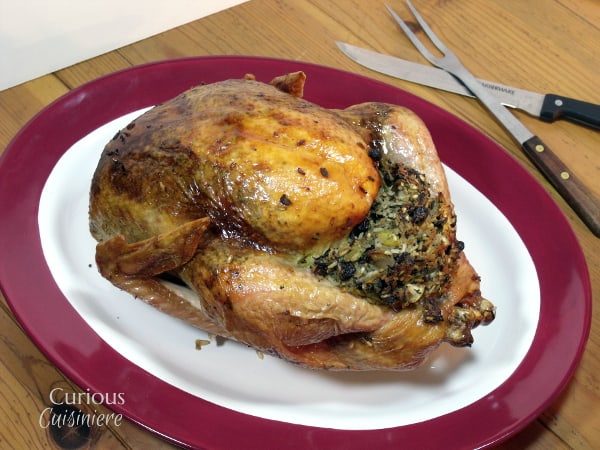
The Perfect Holiday Turkey
You know where you're getting the turkey for your holiday table. But, that's the easy part, right?
Thanksgiving dinner all of a sudden becomes complicated when you open up that nicely sealed package and expose the fleshy-pink bird.
What do I do now?
At least, that's how we felt the first time we roasted a turkey. It's so pretty all wrapped up from the store, but once you cut that bird loose of the packaging, all bets are off.
Today, we're going to walk you through the turkey roasting process that we find works best for us. So, get ready for a bit of a read, there are a lot of steps. But, don't be intimidated. We've broken it down into manageable chunks.
How to Roast a Turkey
Two to Three Days Before
Thaw the bird- If you are using a frozen turkey, move the turkey to the fridge to thaw. Allow roughly 24 hours for every 5 lbs of bird.
Make the stuffing- First, if you are stuffing your bird, make sure that your stuffing is prepared before you start working with the bird. An easy way to save time day of is to make the stuffing ahead of time and refrigerate it until you are ready to stuff and roast the bird.
Day Of: Prepping the Turkey (2 hours before roasting)
Prep the turkey- Take the turkey (and your stuffing) out of the fridge to allow it to come to room temperature. This help it to cook more evenly.
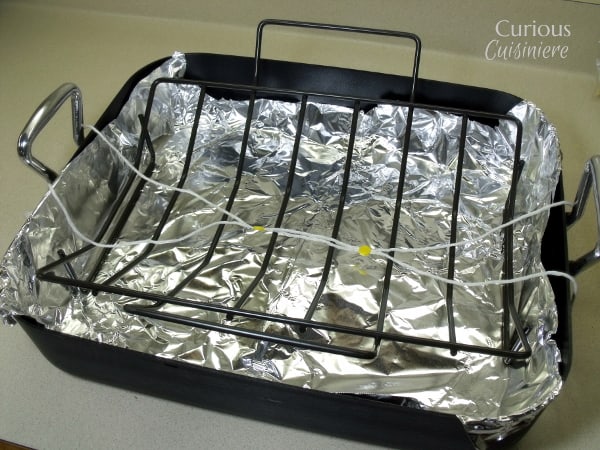
Prep the pan- Our preferred way to prepare our pan for roasting a turkey is to line the roasting pan with foil.
I will never skip this step, even with a non-stick roasting pan. We spent many hours over the course of three days scrubbing my mother-in-law's roasting pan the first time she let us borrow it. All because we didn't think we needed the foil for a non-stick pan.
However, my Mother had a different experience. Foil ruined her non-stick roasting pan. She opts to simply grease the pan first.
So, the choice to foil or not is up to you. (Even better, skip the non-stick roasting pan and go with a stainless steel pan. Then you can foil, or grease, and will likely have better luck all around.)
Either way you choose, you will want to then carefully place the roasting rack in the pan. (If your turkey came with a "turkey lifter" lay that down too.)
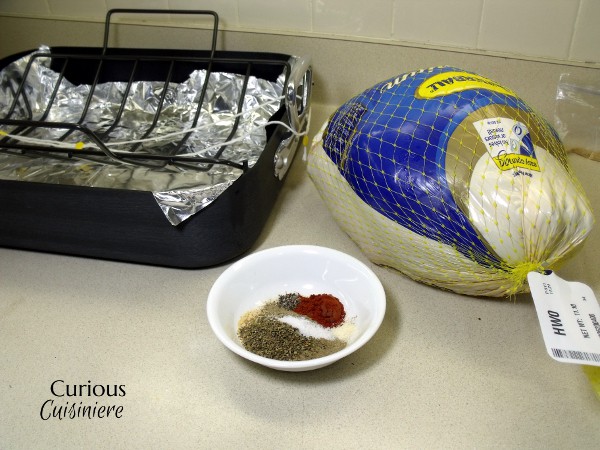
Prep the spice rub- Once you are covered in turkey, you won't want to stop to wash up and get your spices out. So, get them all measured out in a bowl now. (For something a bit fancier you can take a look at our seasonings on our French herb roasted turkey.)
Day Of: Seasoning the Turkey (1 hour before roasting)
Bring the turkey to the sink and take it out of its wrappings. Remove the neck and giblet bag from the body and/or neck cavity and set aside to use in gravy or stock. (Be sure to check both cavities.)
Prepare the bird to be seasoned (optional)- Starting at the bottom of the breast, at the top of the large cavity opening, gently separate the skin from the meat. Slide your hand between the skin and the breast meat. Do this gently so as to not tear the skin, but firmly so you will tear the membranes holding the skin in place. Work your way up as far as you can get towards the neck (leaving a seam closed at the neck) and over the drumsticks and thighs as best you can. The important part is the breasts though, so don't risk tearing the skin getting to every nook and cranny.
Now, I know many of you are about to click the red X on the tab you're reading this in, and wondering "Why the heck would I do something like that?" Let me explain: If you season a bird before roasting, you probably just rub the spices over the skin, and maybe in the cavity. Yes? One problem. When you season the skin, the crispy skin tastes amazing. But, the meat may as well not have been seasoned at all. Right? (Hello BBQ sauce or gravy with your turkey dinner.) The fat in the skin acts as a barrier between the spices and the meat. When you take the time to rub the spices between the skin and the meat, what you get is some intensely flavorful, seasoned meat. (In addition to crisp, seasoned skin.) It's magical. That's all I can say.
Now, if you still don't think it's worth it. By all means, skip this and the following step and just rub the spices onto the skin. It's really up to you.
Season the bird- Once the skin is separated enough, grab that spice mix you prepared earlier. Taking one handful at a time, spread it in the space you have created between the skin and the meat. Get it as even as you can, but don't make it rocket science. As long as the spices are in there, you're good. (That's why we tried not to break the skin. That same skin that used to act as a barrier to keep the spices out now will be keeping them in, flowing all throughout the bird as the juices start to flow.)
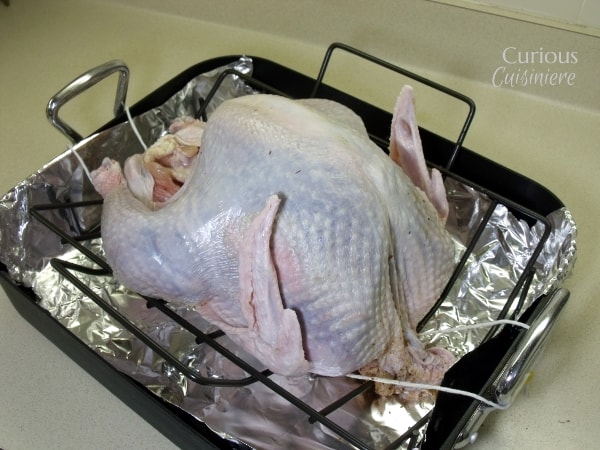
Stuff the bird (optional)- If you're using stuffing, now's the time to fill the cavities. You're already full of turkey, so just keep using your hands. Most birds will have something holding the feet together. You will need to remove this so that you can access the body cavity more easily.
Once the legs are free, stand the bird up like it's walking around, with the breast facing away from you, and stuff the neck cavity first. Pull the flap of skin over the stuffing to keep it in place. Now set your bird on the roasting rack in your prepared pan breast-side up (the rack will help keep that skin in place). Continue stuffing the body cavity. You want the stuffing to be loosely packed.
(If you opt not to stuff the bird, it is a good idea to at least season the inner cavity. Just use the same seasoning mix you used on the outside of the bird, and rub it around the inside.)
Truss the feet- (If you didn't stuff your bird, now's a good time to place it on the pan rack, breast-side up.) Return the feet to a secure position. Use either the provided holder (that you took off to stuff the turkey) or kitchen twine to tie the small end of the drumsticks together. This will keep the legs from flopping about once the meat becomes fall-off-the-bone tender.
Prep the oven- Fifteen minutes before you want to start cooking, remove all but the lowest rack in your oven and preheat to the temperature indicated on the turkey's package. (325F does seem to be a standard.)
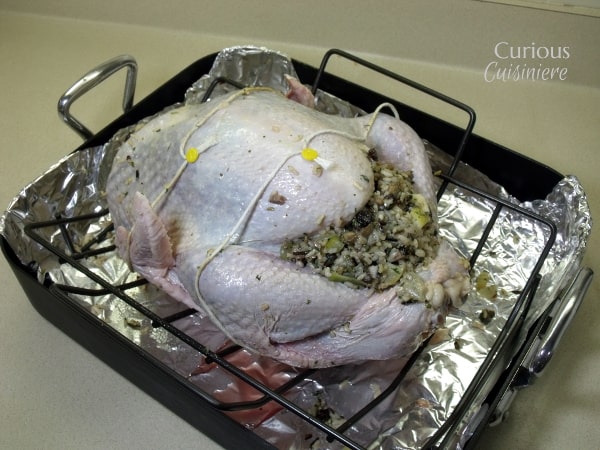
Day Of: Roasting the Turkey (13 min for each pound)
Cook the bird- Place the roasting pan with the bird in the oven. Cook according to the directions that come with the bird. But, the rule of thumb is 13 minutes for every pound of un-stuffed bird cooked at 325F or 15 minutes for every pound of stuffed bird cooked at the same temperature. (A word of note, if you are using a free-range or organic bird, these are less fatty and often result in quicker cooking, closer to 8-10 minutes a pound for un-stuffed. It's always better to check your turkey often and early!)
The BEST way to keep an eye on how your bird is doing is to use an in-oven probe thermometer, like the ChefAlarm (affiliate link, but we love this thermometer). This way, you can keep an eye on the temperature of your bird as it cooks, and you will know if the temperature is going up too fast, or too slow. And you can set an alarm to go off when it hits your desired temperature (160-165F). Simply insert the thermometer into the thickest part of the breast for cooking.
Check the bird- Every 45 minutes or so baste the bird to keep it moist. If the skin seems to be darkening too quickly, tent the bird loosely with aluminum foil to prevent overcooking in certain areas as the rest of the bird finishes up.
If you're not using an in-oven probe thermometer, then one hour before the bird is supposed to be done, check the temperature with an instant-read thermometer (again, affiliate link, but we do love their thermometers). A done turkey will read 160-165⁰F. Insert a thermometer into the thickest part of the breast, near the neck, being careful to stay in the meat and not touch bone. Then insert the thermometer into the thickest part of the thigh, again being careful not to touch the bone, as they are hotter and will skew your reading. When the turkey is done, the juices from the thermometer prick will run clear.
Finally, if you have a stuffed bird, insert your thermometer into the center of the body cavity to check the temperature of the stuffing. The stuffing should read 165⁰F when done.
Day Of: Resting the Turkey (20-30 min)
Finish of the cooking- When the turkey reads the proper temperatures it's good to remove from the oven. Tent the turkey with aluminum foil. Let it set in the roasting pan for 10-20 min for the juices to settle before moving the turkey to your platter for carving. (These 20 minutes are a perfect time to make gravy from the drippings in the bottom of the pan.)
After resting your turkey, it is ready to be carved and served!
See, that wasn't that hard!
If you'd like a printable version of these instructions - the steps we've laid out above are condensed in the recipe below for easy reading.
How To Roast A Turkey
Ingredients
- 11-15 lb turkey
Spice Rub
- 1 teaspoon garlic powder
- 2 teaspoon onion powder
- 2 teaspoon ground thyme
- 2 teaspoon oregano
- 1 teaspoon paprika
- ½ teaspoon salt
- ¼ teaspoon ground black pepper
Instructions
- Two hours before roasting, place your thawed bird (and stuffing) on the counter to bring to room temperature.
- Line roasting pan with foil (if you so choose). Carefully place rack in pan. (If your turkey came with a "turkey lifter" lay that down too.)
- Mix all spice rub ingredients together.
- Take the turkey out of its wrappings. Remove the neck and giblet bag from the body and/or neck cavity and set aside. (Be sure to check both cavities.)
- Separate the skin from the meat, starting at the bottom of the breast near the large cavity. Slide your hand between the skin and the breast meat, gently separating the skin from as much of the meat as possible.
- Rub the spice mixture between the skin and meat. (Alternately, rub the spice mixture over the skin and into the cavities of the bird.)
- Stuff the neck cavity of the bird and place it on the rack of your roasting pan, breast side up. Take the legs out of the holder (if one is provided) so you can access the body cavity. Stuff the body cavity until loosely packed. (Alternately, just place the bird on the roasting rack.)
- Using kitchen twine tie the small end of the drumsticks together (or place back into the holder, if provided).
- Fifteen minutes before cooking, remove all but the lowest rack in your oven and preheat to 325F (or to the temperature specified on your turkey's packaging).
- Place the pan with the bird in the preheated oven. Cook according to the directions that come with the bird. (The rule of thumb is 13 minutes for each pound of unstuffed bird, and 15 minutes per pound for a stuffed bird.)
- Every 45 minutes, baste the bird to keep it moist.
- One hour before the end of cooking time, check the temperature of the bird in the thickest part of the breast and in the thigh (165F) and in the middle of the stuffing (165F). The juices should run clear.
- When done, let the turkey rest in the roasting pan, loosely tented with foil, for 10-20 minutes before moving the turkey to a platter and carving.

Sarah founded Curious in 2010 as a way to save her recipe creations and share culinary experiences. Her love for cultural cuisines was instilled early by her French Canadian Grandmother. Her experience in the kitchen and in recipe development comes from over 10 years working in professional kitchens. She has traveled extensively and enjoys bringing the flavors of her travels back to create easy-to-make recipes.